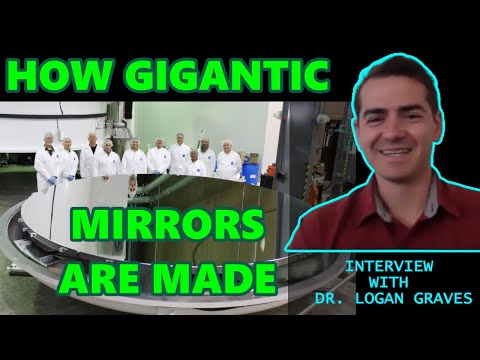
In this interview with Dr. Logan Rodriguez Graves, we learn about how gigundous, expensive mirrors in observatory telescopes are made, medical imaging, and other things you can do with a degree in optical science.
Medical Imaging for Diagnosing Colon Cancer
As an undergrad, Graves worked in a University of Arizona group that researched new methods for imaging colon cancer. The “traditional” way to image your innards typically includes drinking a nauseating liquid sludge that makes things fluoresce. Don’t ask me why I intimately know what it’s like to drink that garbage.
The researchers Graves worked with came up with new ways to poke around in there without that beverage. For one thing, they found that lesions and cancerous tissue in the colon can be highlighted by hitting them with certain wavelengths of light — no cocktail needed.

Graves told us about other GI-imaging work a University of Arizona team did which included Drs. Bhaskar Banerjee and “Ron” Liang. They developed an optical device that could look both forwards and backward in a colon at the same time. That way, no cancerous masses can hide! The tech was spun off into a company called Omniscient Imaging, Inc.
Graduate-Level Optics Wizardry
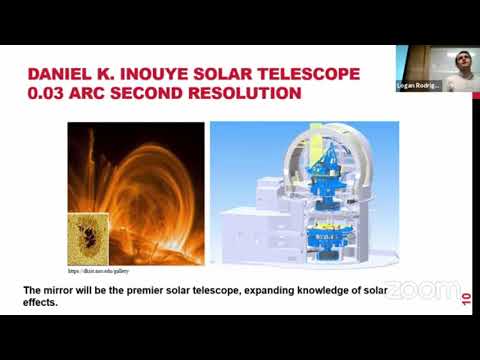
Logan Graves’ doctoral dissertation involved metrology methods used in the fabrication and verification of huge mirrors. Specifically, Graves helped measure the mirror surface that would eventually be installed in the Daniel K. Inouye Solar Telescope, or “DKIST” for short.
This telescope is set up in Maui, Hawaii, and is currently the largest solar telescope in the world. While the primary mirror inside it now enjoys a tropical vacation, it was born in a lab in Arizona.

The 4.26-meter telescope is about 14 feet in American speak, or the size of a large, outdoor trampoline.
Because this thing images the sun, some extra engineering challenges were present. As you may know, the sun is very bright. It is also very hot. So, to make sure the telescope didn’t warp, melt or fry like an ant beneath a kid’s magnifying glass on a sunny day, a new material needed to be invented.
The substrate for the mirror needed to be created from something that wouldn’t expand a lot when it got hit by sunlight. That’s because, even if it didn’t catch fire, expanding too much could still distort the image the DKIST captured. That’s why SCHOTT stepped in and came up with a novel glass-ceramic material called ZERODUR®. Its extremely low coefficient of thermal expansion is what makes ZERODUR® special.
Why Metrology on a Multi-million Dollar Telescope Mirror Is So Difficult
When Logan Graves came aboard the DKIST build, the design for the telescope and the fancy new material was already set, but the fabrication methods needed some love. After all, this thing being built was about to become the largest telescope in the world of its kind!
To grind down the mirror to its final, polished shape, different fabrication stages were required. All these stages required measurement. As the material is scraped away, there needs to be a way to check how much still needs to be taken off and how much has been removed already.

That all seems simple enough, but because the end application is a multi-million dollar telescope, metrology requirements get a bit trickier. For one thing, many millions of dollars is a lot of money! So, you better not make any mistakes. Not one mistake. Not one. You need the one you make to work, unlike with high-volume manufacturing where you expect a percentage of failure.
Another thing to keep in mind is that, as with all precision optics, you can’t touch it. You can’t breathe on it let alone drag a mechanical profilometer across its surface. So, you need to make highly precise, foolproof measurements without touching the mirror.
Pros and Cons of Interferometry
The “gold standard” way of measuring a mirror surface like this is with interferometry, which is a precision, non-contact measurement method. On the downside, it’s also extremely expensive and requires you to make a perfect physical reference shape. Then, you’d measure the part you’re creating and the reference shape and the difference between the measurements is the error.
With the concave DKIST mirror, this process was especially difficult. There was an enormous size for one, but also the shape was off-axis and parabolic. If the cutout shape were spherical instead, then you could buff it out with a spinning sphere. However, because it’s wonky, making and testing the thing is a lot more complex.
Another drawback of interferometry is that in measuring large surfaces, you typically can’t measure the entire surface at the same time. Instead, you may need to take several measurements and stitch them together. Those overlap areas are prone to errors, and again, with multi-million dollar widgets, error is bad.
Yet another con of using interferometry exclusively is that it only works when the shape you’re measuring is pretty close to the reference shape. So, if you’re at those rough, beginning stages of grinding down the mirror, interferometry will have limited utility.
What is Deflectometry?
In contrast to interferometry, deflectometry can be used more easily in the beginning stages of cutting out the mirror. It’s also cheaper as it doesn’t require a reference shape to be built.

Instead, the reference used is a source, maybe a digital display, with a test pattern of known dimensions. If you shine that source on the mirror and image the reflection, then you can tell what the mirror looks like by how the image got distorted.
For example, think of a warped funhouse mirror. If you see an image of yourself that is 3 feet tall with a face larger than your rear, but you know that you are 5’10” with a normal-sized noggin, you can tell how that reflective surface is bent out of shape. Once you get past the initial shock, you can see the distorted image not as a mangled human but as ripples in the aluminum.
If you want to understand deflectometry more deeply and are a fan of The Matrix, check out Graves’ doctoral dissertation defense. He explains deflectometry with the image of the red and blue pills reflected in Morpheus’s sunglasses.
The Grinding Phase
An early stage of the mirror fabrication process is the “grinding stage”. This is where the telescope gnomes would take the mirror surface from looking like matte paint on a pimped ride to something where you can start to see a reflection. Compared with the final polishing step, this part of the process is where loads of material would be cut away.
The grinding process uses a robotic arm to press and spin a slurry that has polishing grit mixed in. It looks way too messy to be able to do precise grinding with, and yet, with the help of IR deflectometry, they were able to measure and monitor this rough surface. Interferometry and visible deflectometry were also used to corroborate the IR deflectometry measurements.

By using IR deflectometry in this part of the process, the team was able to save a lot of fabrication time.
It was easier to see where they could take large chunks out of the material that wasn’t close to the end surface. That, in turn, allowed the DKIST mirror to be fabricated in a little over a year, which Logan tells us, by observatory optics standards, is astonishingly rapid.
“Super Smooth Mirror”
A “Super Smooth Mirror” is actually a category of mirror. That’s something you know now. Once the highest level of polish was finished, the DKIST mirror had about 19 nm of roughness across the entire surface. If you look at the deviation across a smaller surface area of about 2x3mm, it’s even lower at less than 0.7nm, which equals “super smooth”.

But what does a surface roughness of 19nm really mean? During Graves’ dissertation defense, he explained this 19nm deviation is comparable to a topographical deviation between 2 places across town being half the width of a human hair. So, any hill or pothole between you and some point several miles away would need to be no higher or lower than half of a human hair.
Ok, props, doc!
To check the mirror’s surface at the final stage, not only the shape but the surface roughness was important to gauge. Multiple types of deflectometers and interferometers were used to scan the surface as the final check. Then, all those measurements were cross-checked to make sure they were all in agreement.
Graves as a Free-Agent Optical Scientist
Since graduating, Graves has been busy with lots of different projects. With his partner, Dr. Isaac Trumper, he’s done random freelance optical engineering work at their company, Intuitive Optical Design Lab. They’ve consulted on small hardware startup projects all the way to helping develop LIDAR systems from scratch.

Over at ELE Optics, he’s also working on PM software to specifically address challenges involved in communicating optical engineering data. When we optical engineers work on a development team, our design work is unintentionally hidden away from other engineers in a black box. That’s just how our software works! I’m excited to see what their R&D team comes up with in the future to make this less of a problem.
Optics Forum and Podcast
There are other goodies over at ELE Optics including an optical science and engineering community forum. This is a great resource to find specialists and ask hard-to-Google technical questions regarding optics and optical software.
You can find the Spotlight Report podcast there, too, which I personally enjoy (and have been on as a guest). This podcast has traditionally included interviews of mostly optics nerds but Logan welcomes all sorts of engineers as scientists as guests.
Want Guidance from Dr. Logan Rodriguez Graves? Book Him on OddEngineer.com!
If you’d like Logan Graves to give you metrology methods guidance for your application, you can directly book an appointment with him on Odd Engineer at this link.
There’s no need to ask him about his availability! Just click the “Schedule Appointment“ button, and book and pay for whatever available time and day works for you. If you need him to sign an NDA for your meeting, you can upload a signed copy when you book. You’ll then receive an email with a Zoom meeting link.
Full Interview with Dr. Logan Graves on the Odd Engineer Podcast

Want to hear the long, unabbreviated version of this interview? Check out Odd Engineer’s podcast for advice and more details on metrology methods and the DKIST project.


