If you count yourself amongst one of the early adopters of the iPad Pro, chances are you’ve also been using the device for the bulk of your digital sketching purposes, too. But for users who still prefer analog sketching with paper for the earlier part of the ideation process, digital sketching – iPad Pro or not – will likely always be a cumbersome experience.
The most common analog to digital sketching workflow consists of some variation of sketching your content on paper with traditional media and scanning (ideal) or taking a photograph of the sketch to be put in Photoshop. Once in Photoshop, the sketch can then be cleaned up with some levels adjustments, composition, and simple linework editing. When the finished linework is ready to go, it can be used for easily exploring color and form with various digital rendering methods and mediums.
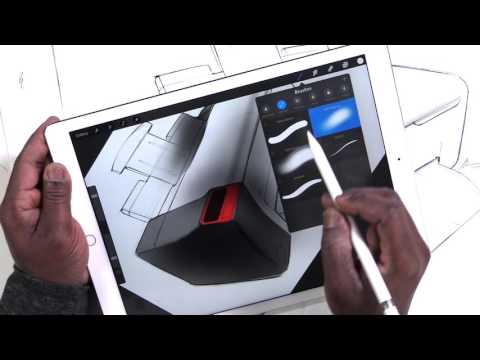
But if your iPad Pro has a decent camera and scanning app – not to mention a stellar sketching app – how can this process be streamlined with a single device?
In his latest sketching tutorial, industrial designer Spencer Nugent shows us the workflow of sketching a product on paper and getting those lines into an iPad Pro sketching app for finishing work.
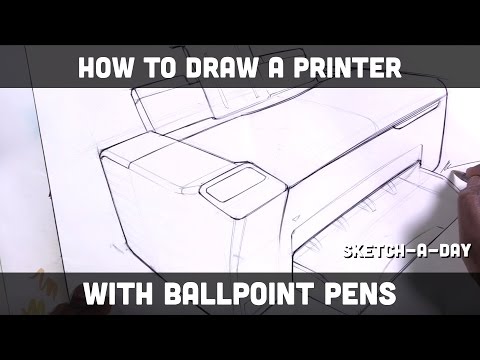
“(Here’s) a simple demo of building a form from a 3 point perspective wireframe,” says Nugent. “I love sketching printers (for some reason). So here’s a quick look at my process of sketching a simple printer (and taking ) a quick shot (to) render using Procreate for iPad Pro.”
Sketching the Printer with Ballpoint Pens:
Importing Sketch to iPad Pro: