There’s something about epoxy and wood that creates some of the most fascinating wood pieces we’ve seen—be it a side table, a bowl, or in this case—a hand-carved pendant light. For his latest wood project, YouTube creator


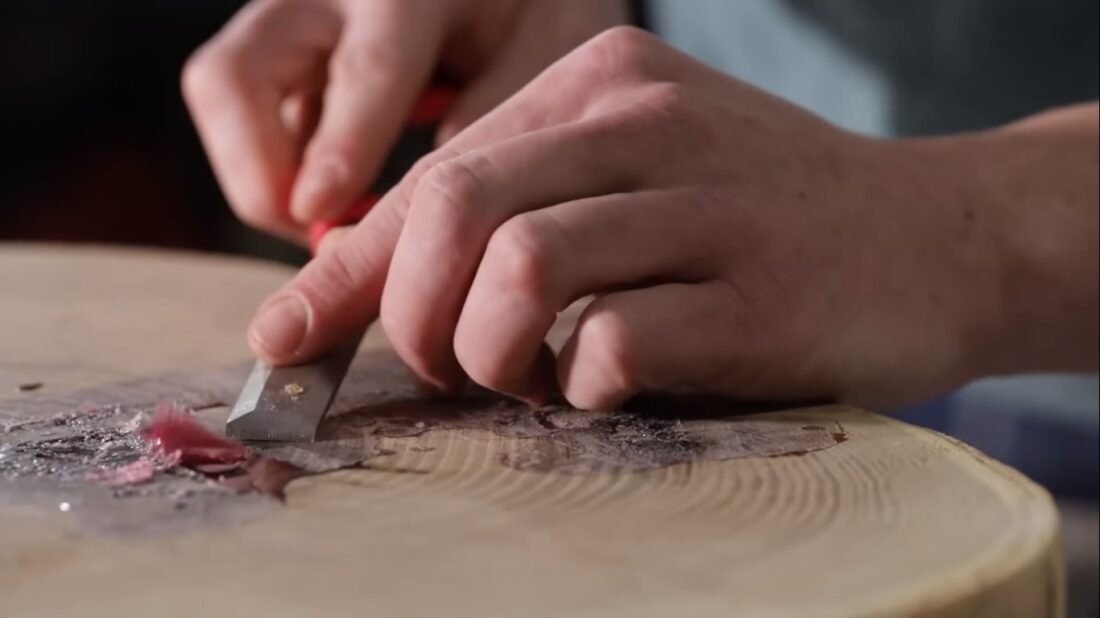
After flattening the slab, chiseling off the bark, and sanding it down, he mixes some epoxy resin and pours it into the wood cracks. He uses a red pigment in the epoxy, as the wood he’s using has a reddish hue to it. Before leaving it to dry for a day, he takes an inexpensive blow dryer and passes it over the resin. Twenty-four hours later, he takes a chisel and chips off the excess resin carefully before sanding the surface once more.

He then experiments marking different areas of the wood where he would like to put the LED strips before cutting them out. You can see the patterns follow the wood grain itself. This will give the lights a more natural look as they fit into the shape of the wood rather than go against it.

Instead of cutting the patterns by hand, he imports a top-down image of the wood onto his computer and uses Affinity Designer to mark the patterns digitally. Not only does this make sketching the pattern easier, but it helps him see how the finished design will look like and aids with the origin router’s cutting process.


For those unfamiliar with the technology, an origin cutter uses a camera to locate pieces of domino-looking tape to situate itself in a workspace. Since the tape has to be on the same level to work, he creates a three-part rig around the cookie slab to make the cutting process possible. With the wood covered in tape, he uses the digital pattern as a reference point to pass the origin cutter through.

Now for the part everyone’s been waiting for, installing the LED strips and covering them in resin. Before attaching the strips, he drills holes on the edge patterns to allow the circuitry to pass through and be installed.


Once finished and all the tape is removed, he attaches the adhesive LED strips onto the inner walls of the drilled pattern before clogging the drilled holes with a hot glue gun. This doesn’t just keep the wires in place; it prevents the epoxy resin from leaking out once he pours in into the wood.


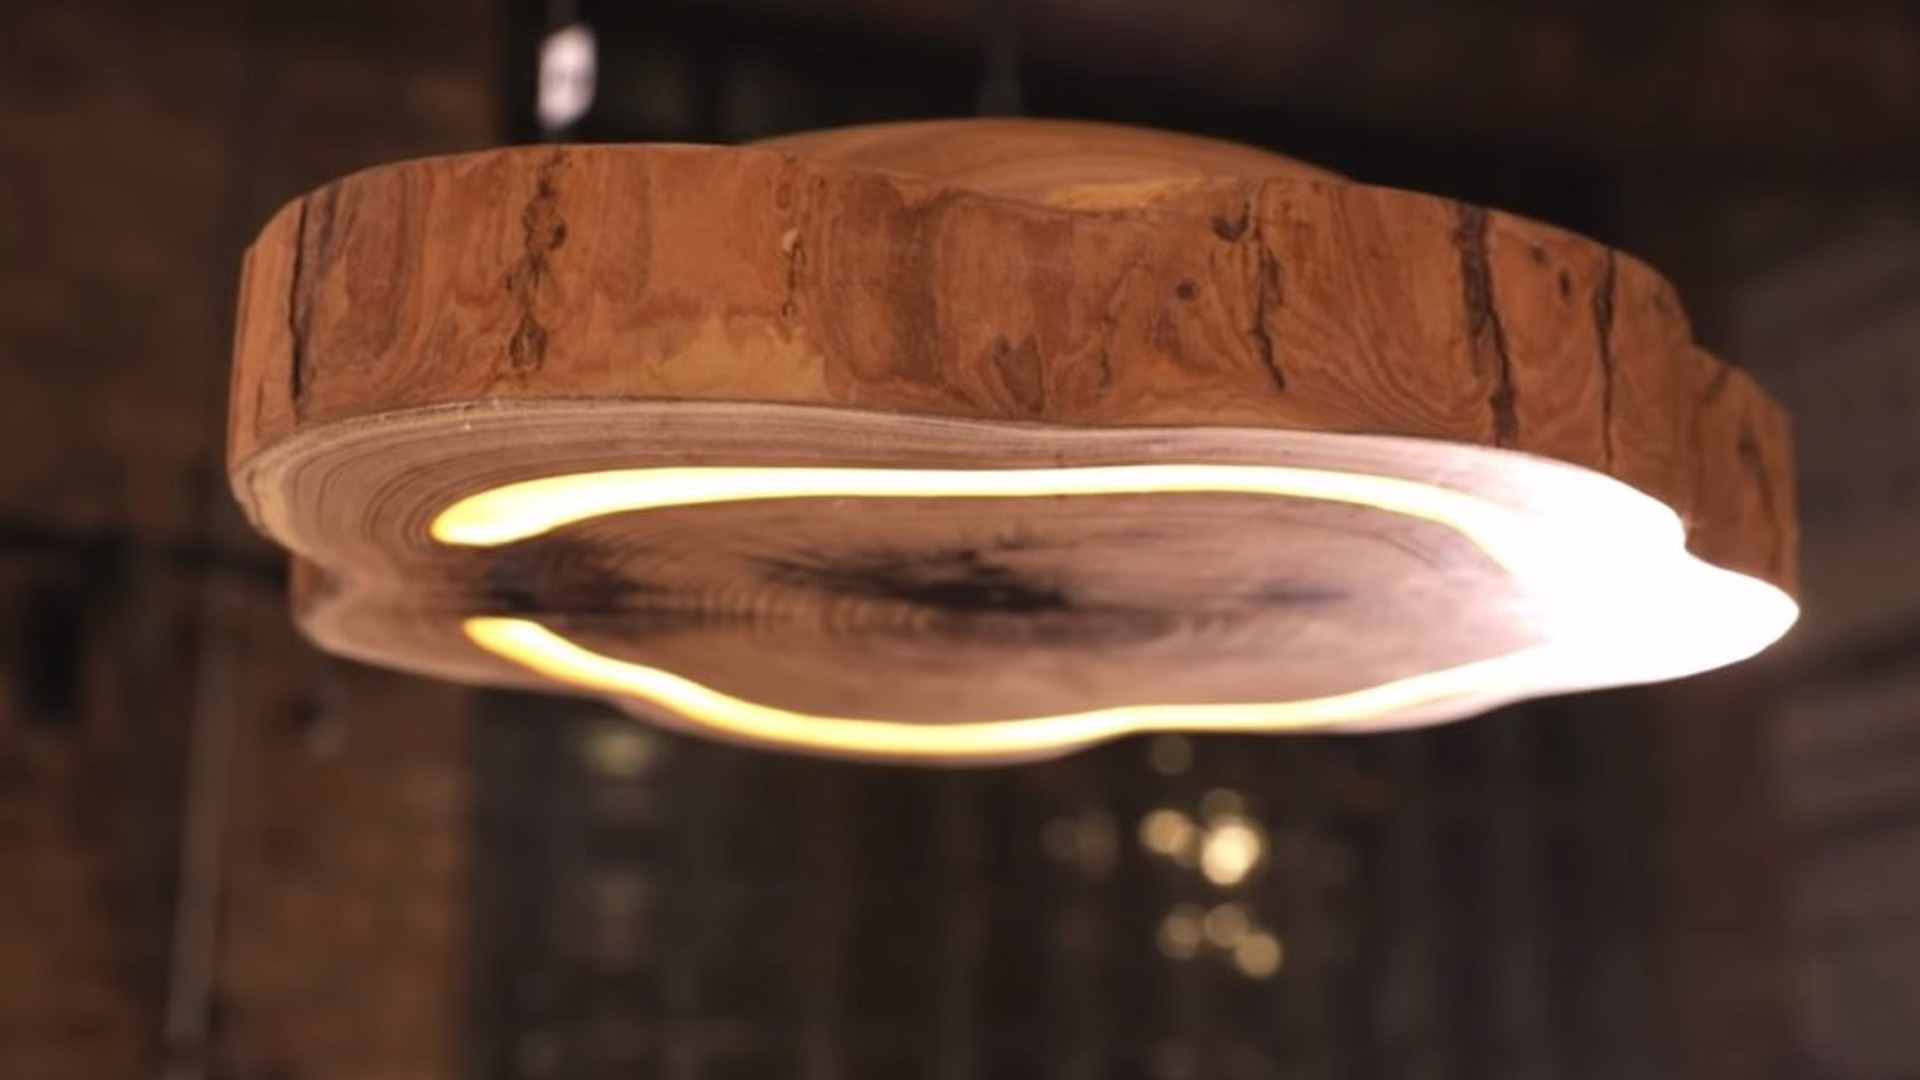
Now for the epoxy. He first pours a 2:1 mixture of epoxy resin to cover the LED strips before coming back a few hours later with a thicker epoxy mixture with a white pigment. Unlike the previous mixture, this opaque resin is thinly poured to diffuse some of the light coming from the LEDs. He runs a blow dryer over the drying resin before leaving it for another 24 hours to harden.

One day later, he adds a final mixture of transparent resin onto the opaque layer to finish things off with a subtle sheen.


Turning the wood over, he gets to work on carving the channels for the electronics to sit in. Using a drill and a chisel, he carefully carves a path for the LED wires to set relatively unseen. He also crafts a back cover for the pendant light using some extra maple wood from some of his older projects.


The only thing left to do before installing the electronics is to sand down the day with a 240-grit sander and a series of different sandpapers (up to 1500-grit) and apply a finish to the sanded light.


To get the LEDs to light up, he attaches a 12-watt AC to DC converter to the wires. This converts a standard outlet’s AC power into DC wattage which can be used to power the LEDs. Since the lights in question use 5 volts instead of 12, he adds a step-down voltage regulator, so the power supply won’t cause the lights to explode from being overpowered.

Cover up the electronics with the back cover and connect it to a socket and you have yourself a modular wooden pendant light to brighten up your home. There is no way to switch the LED strips once they’ve run their course and while overheating is an issue, Modustrial Maker plans on making a future video which refines this pendant light experiment to make it a more replaceable, long lasting fixture.
You can find both his old and upcoming videos on his YouTube channel, Modustrial Maker.


