Color us impressed. Reddit user ‘bcmanucd‘ has just shared his process on the trending /r/DIY subreddit of creating a time trial bike for his wife using his university’s engineering shop. While it’s unclear what his design or engineering background is, one thing is for certain: the dude can build a pretty impressive bike!
Here he shares his process:
In 2009, my wife (girlfriend at the time) was racing on our college’s cycling team, and needed a time trial bike to compete at the national championships. I was finishing my master’s thesis, and neither of us had a lot of money, but I had a lot of free time and access to the college of engineering’s machine shop.
I wasn’t satisfied with the half-assed budget TT bikes of the day, so I offered to design and build her a bike. It turned out to be a very lengthy, involved process, but I learned a whole lot from it, and it helped her win the women’s team time trial national championship that year.
The geometry was based on a fit assessment from her coach. The position is very aggressive, and necessitated a head tube length of 85 mm including headset. I drew up a sketch of the frame in Autodesk Inventor, and then attached an assembly of modeled tubes to the sketch.
The model in Inventor was crucial to the development of the design, as it allowed me to analyze clearance issues (i.e., crank and chainring clearance with the chainstays). I was also able to use the tubing profiles to create NC programs for tube mitering and milling of the dropouts and head tube, for example.
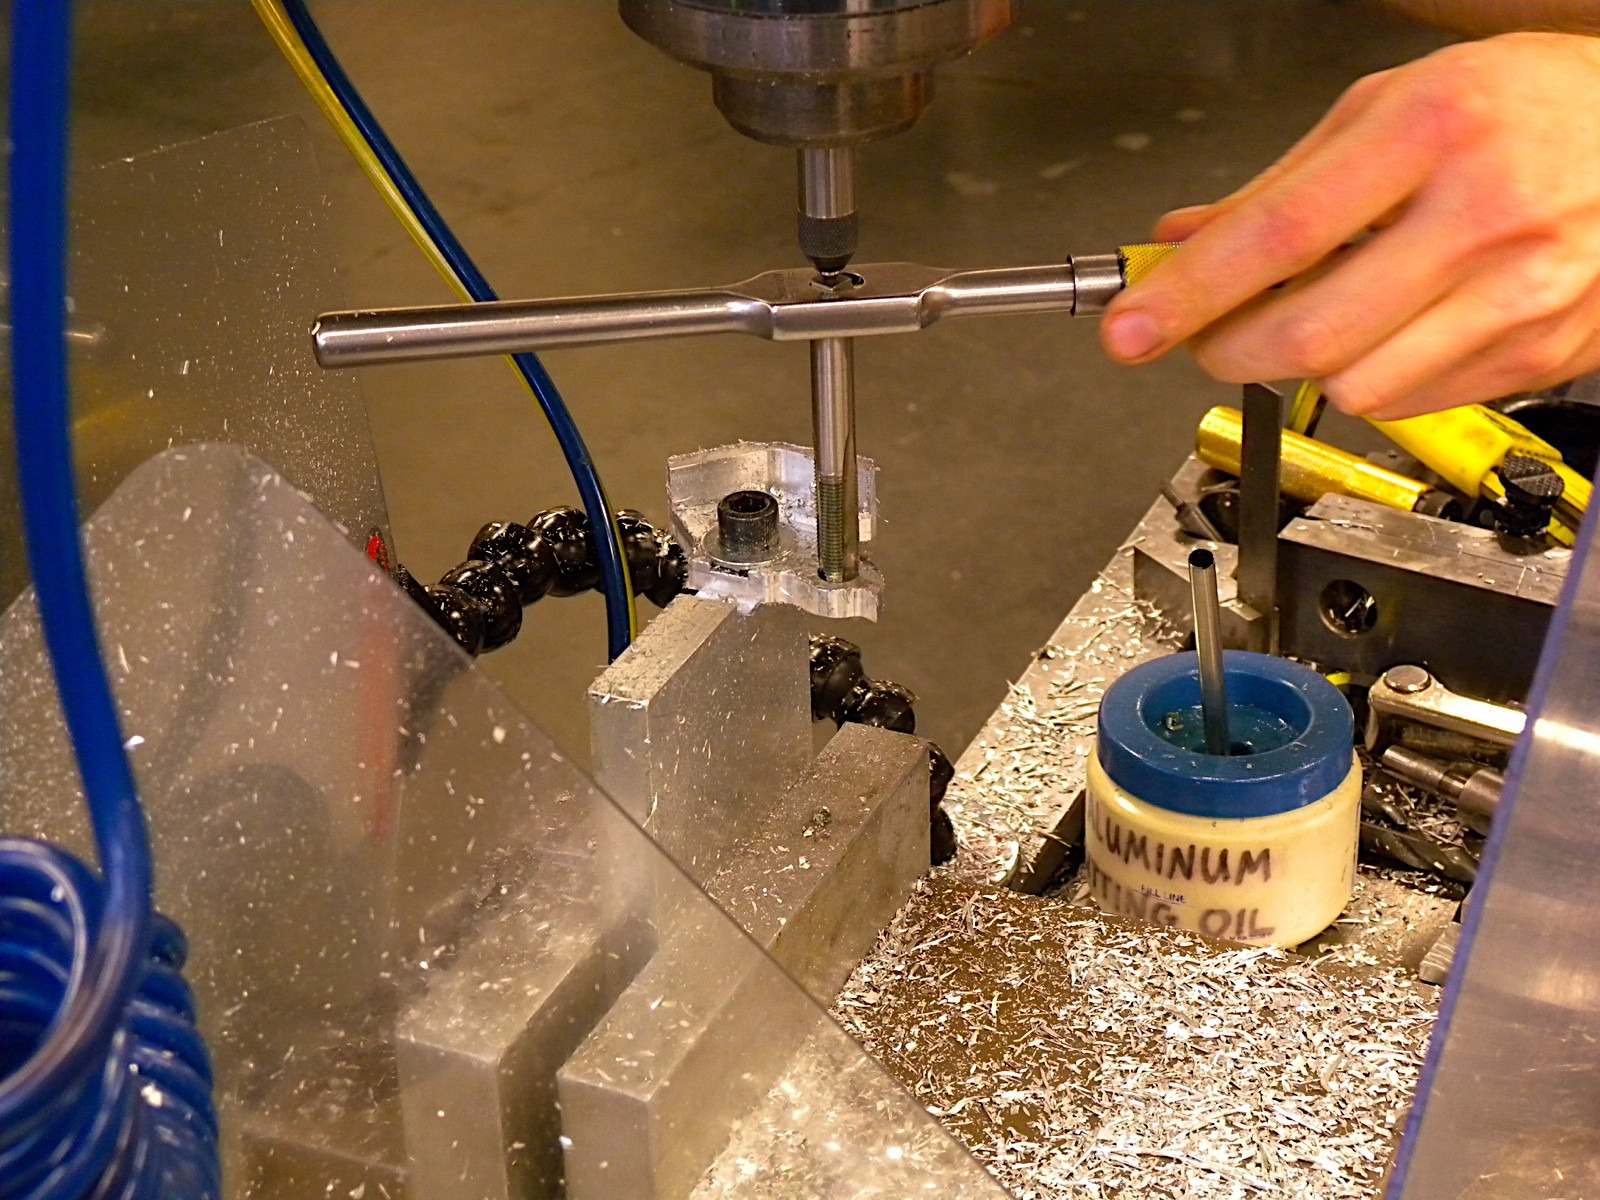
I chose to use 7005 aluminum alloy, as it would not require solution heat treatment. My suppliers were Nova Cycles of Rocklin, CA and Fairing Industrial of Chino, CA. Each tube had a unique cross section, so I used a Mitutoyo coordinate measuring machine (CMM) to measure tube shapes. This is the down tube. The CMM recorded x and y coordinates for the surface at every millimeter, and I was able to import this data into Inventor.
I did most of my machining on a Bridgeport vertical mill with hybrid CNC controls.
I wanted the head tube to be both short (for the fit) and narrow (to reduce frontal area). I designed the head tube to accept an integrated headset and a 1″ steer tube. This got the diameter down to 42 mm on the ends. with some intricate surface milling I reduced the width to 35 mm in the middle.
The head tube after surface milling. I clamped the head tube in the welding fixture, and kept it there through the welding process to maintain orientation.
Notice that the head tube is narrowed on the sides and rear, but convex on the front to increase the chord length of the head tube junction.
I couldn’t find a head tube reamer for a 1″ integrated headset, so I made this reaming insert for a VAR headset reamer & facer. I used 4140 steel and had to resort to hand filing for the reliefs to get good cutting surfaces.
No one makes horizontal dropouts with derailleur hangers in 7005, so I machined these as well.
Each dropout required 4 separate NC programs on the mill. You can see I used my welding fixture for clamping here as well.
Tapping the derailleur hanger. I consulted Shimano’s literature to determine the optimal placement of the hanger bolt hole.
The completed dropouts
The dropouts, viewed from the front. I machined plugs to fit inside the stays to aid in the fixturing of the frame. The corners were sanded flush with the tubes later.
The dropouts with set screws installed. This allows a convenient way to adjust the spacing of the rear wheel behind the seat tube. Note the knurling impressions on the right dropout – I clamped the dropouts in a rear wheel to do a frame mockup to check clearance on the rear brake and cable routing.
Mitering the top tube. I used FeatureCAM to write NC programs for the tube miters based on imported Inventor parts files. The clamps holding the thin-wall tubes were also cut from FeatureCAM programs based on the tube profiles from the CMM.
The Welding fixture. I machined several blocks to hold the dropouts, bottom bracket shell, head tube, and main tubes, and clamped them all to an optical table.
I also had the frame sketch printed out in 1:1 scale. This was very helpful in laying out the fixture on the table.
The tube clamps used for mitering also doubled as welding fixtures.
The fixture block for the dropouts. The plugs for the stays were key in fixturing the frame.
The bottom bracket joint, coming together. I had to do a mockup of the rear wheel, frame, and rear brake to determine the optimum shape for the opening in the down tube for cables to exit. This required several iterative cuts of the down tube’s bottom joint.
This chainstay bridge plate also served as the mounting point for the rear brake. I replaced the mounting stud on the Oval Concepts aero brake with a bolt, and threaded the hole in the plate. I rotated the seat tube out of the way for this photo to illustrate the upper side of the plate – note the rib reinforcing the bolt hole.
The bottom bracket with the seat tube, bridge plate, and one chainstay in place. This would prove to be the hardest region to weld based on the awkward access.
The head tube junction. I filed off the contour lines on the head tube later, which helped with the fit. Notice the hole in the top tube near the trailing edge of the down tube. I cut holes in the top tube to route the cables through the frame, entering behind the stem. I inserted an unused portion of the seatstay in the top tube to reinforce these holes.
The welding setup: clamps, vise, file, wire brush, wire cutters, 5356 weld rod, leather gloves, auto-darkening hood, and jacket. I was spoiled with a Miller Synchrowave 350LX.
Here is one of my welding test pieces. The welds weren’t always pretty (right), but I proved to myself that they were strong, and they cleaned up nicely (left).
I spent as many days practicing welding aluminum as I did actually welding the bike.
After completion of the welding (and the day in the oven), I started a lengthy process of sanding down the joints and building them up with Bondo body filler. It was meant as an aero bike, not a light bike, but the total frame weight before paint was 2.75 lb. Not too shabby.
It took many applications of Bondo to get acceptable fillets.
The bike, fully assembled (minus wheels). After Bondo came a layer of self-etching primer, but the painting process was interrupted on the weekends. By that time she needed it for races!
The bike from behind. Note the rear brake, the wedge-style seatpost clamp, and clean cable routing.
The fillets still aren’t perfect, but that’s where high-fill primer came in later.
Here’s a shot of the bottom bracket area. you can see the placement of the rear brake a bit better. Adjustment of the pads isn’t easy with the cranks installed, but this was never a bike of convenience.
My wife models the bike. Here’s that aggressive position I was talking about.
Look at that smile. i think she likes it!
Back to painting. I resumed with several layers of high-fill primer (with delicate sanding in between), a white top coat, a blue fade done with an airbrush, and a few layers of clear coat to get things glossy. We then cut masks from Contac paper (a lovely wood-grain pattern).
The final step was a few layers of flat black enamel for a durable finish. I used Dupli-Color automotive paints throughout, as I’ve been dissatisfied with common hardware store rattle cans in the long run.
Notice the homemade masks under the paint. The goal was glossy white-blue-faded letters on a flat black backdrop.
All in all, I’m quite pleased with the results.
As he mentioned in the introduction,”…it helped her win the women’s team time trial national championship that year“……If this isn’t true love, then I don’t know what is.
Simon is a Brooklyn-based industrial designer and Managing Editor of EVD Media. When he finds the time to design, his focus is on helping startups develop branding and design solutions to realize their product design vision. In addition to his work at Nike and various other clients, he is the main reason anything gets done at EvD Media. He once wrestled an Alaskan alligator buzzard to the ground with his bare hands… to rescue Josh.