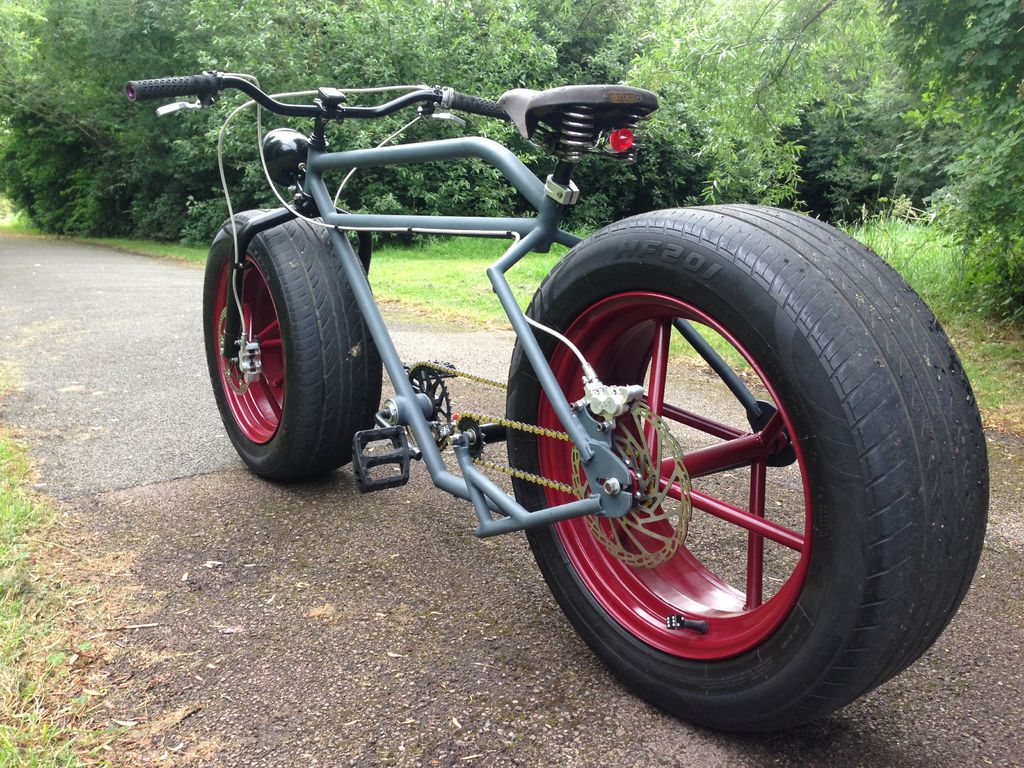
Welding is a useful skill to have, especially if you want to repair your vehicle, which was the goal of Instructable user Mr-Mash who figured it was cheaper to repair his own rather than taking it to the shop. For him, the easiest way to learn welding was to build one big, freakin’ bicycle outfitted with… wait for it, CAR TIRES–16″ Radials to be exact–earning himself the ultimate in street-cred among badass bike enthusiasts.
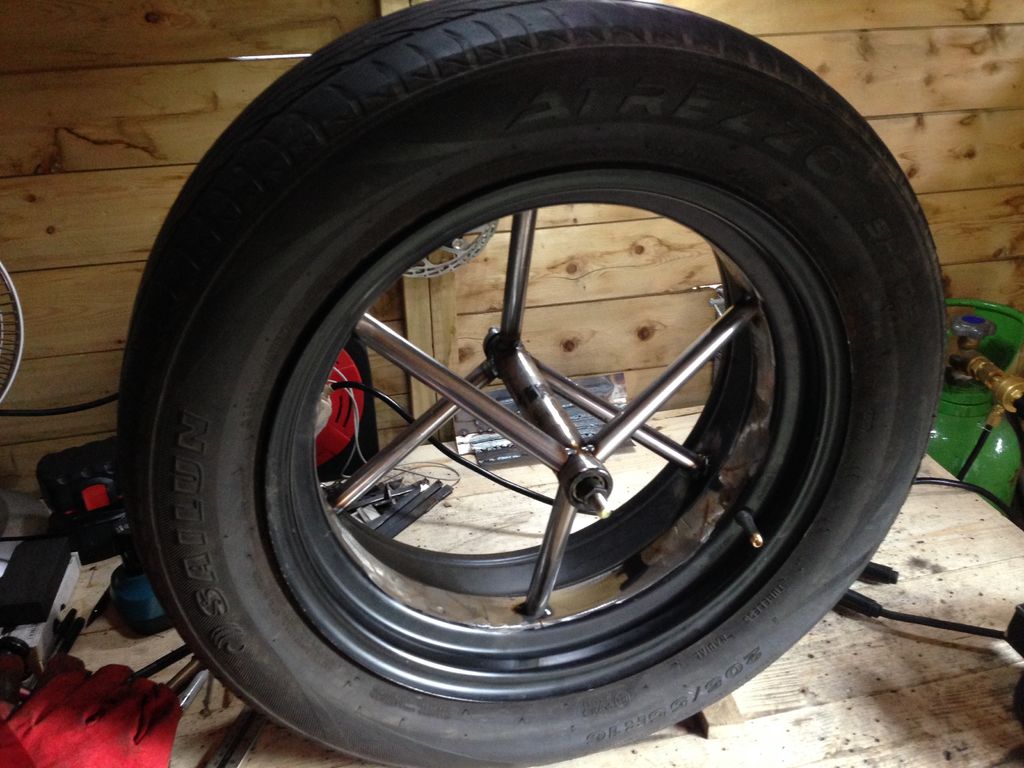
After looking at some creative builds from Atomic Zombie, Mash began his build with a donor BMX bike to get most of the bicycle components he would need for the build, some additional 1-1/4″ and 3/4″ steel tubing and of course, car tires and rims. He cut the middle part of the rims out using an angle grinder, using the additional steel tube to construct the bike rims. Before we go on with the rest of his endeavor though, here’s a short video of him testing the roadworthiness of his initial build:

Suprisngly smooth riding, isn’t it? (The SolidSmack crew is already going through dumspters for tires.) Mash then took on the task of widening the hubs from the donor bike in order to fit the larger tires, which he did by cutting in half and welding another axle section to the two halves.

With the new, wider hubs finished, he then took to ‘spoking’ the wheels, a tricky procedure that has to be done correctly or, if unaligned, off-center or crooked makes your ride a wobbly mess. He created a slick looking six-spoke design to better handle the weight of the tires and keep from deforming on long fat tire bike rides.
His next task centered on the bike’s forks, which needed to be both widened and lengthened to handle the tires. He cut the donor bike’s steel tubing from the upper section, added the necessary pipe and welded it back together. The same was done to the seat-stays on the rear of the bike in order to accommodate the larger girth of car tires. These were then attached to the frame he cut and welded together using the 1 1/4” steel tubing.

To complete the build Mash used Sturmey Archer sprockets and added disc brakes, as standard rubber brakes can’t supply the stopping power for a bike massive car wheels (ya think?) and would simply disintegrate after a good, hard ride.
To complement the large bike, Mash gave it a great paint job starting with a zinc primer (to protect against rust), a yellow primer filler (to hide all of the dings) and finished with what looks to be a cobalt blue for the frame and a cherry red for the rims (he doesn’t specify).
Mash states that before he built his bike, he had no knowledge of how to make cuts, weld or had any experience with designing a frame but after a few cuts and burns, he learned what he needed to do to get it done. You are an inspiration, Mr Mash, truly.
For a complete walkthrough of his build and the materials he used, head over to Instructables. There’s a lot of great discussion on the design in the comments as well, so check that out. Oh, and if you have any interesting builds like this, or know someone who does, send ’em in!